The drilling press was modified by a previous owner. As it can be seen in the picture below, someone added an intermediate pulley in the driving train to reduce the rotation speeds. What was the motor pulley became the intermediate pulley and a new single step pulley was fitted to the motor shaft. I have some doubts about the origin of this variation: would it be made at the Wörner factory after a specific requirement by a client?
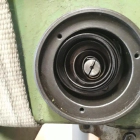
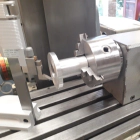
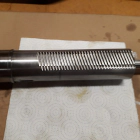
The Wörner quill is again on the drilling press. After being completely cleaned and disassembled, the quill rack was touched up to correct the damage that probably was made while assembling the pinion some time ago. Main bearings were replaced by a new ones. Old ones have a suspicious mark that suggest they are no plain 6006 deep grove bearings. GMN redirected me to the spanish contact Berkomat and they concluded that class P4 6005 bearings would be the right replacement.
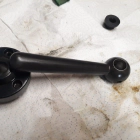
Some of the parts of the Wörner B13 were originally blackened. Rust have ruined most of those finishings. Thus I was faced to polish them to clear metal or try to recover original black coating. I found interesting to experiment with those cold blackening solutions and give them a try. What follows is the resulting experience.
The parts to be processed were:
The screw plug of the quill retention. The handle and bearing support of the belt tensioning pinion.
Joan’s advices Final steps on paint works. I last post I wrote about the problems with the table lack: final layers suffered of cracking. After a talk with a Joan, who has a large experience as professional car painter and always has time to help a friend, he diagnosed the problem: layers incompatibility. He gave me a kinda of principles to follow when painting machines. I want to share then here:
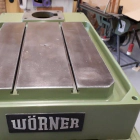
Painting works are coming to the end. Last days I finally got some lack cans to do the final coating. Not an easy task due to COVID'19 lock down. I sprayed most the prepared parts and this is the result:
Overall, the finish quality is really good. The enamel used is of semi-gloss sheen and gives a really silky touch to the surface.
As I mentioned in the previous post, the base suffered of cracking defects that worsened as the layers become drier (it lasts about three days to fully dry).
The Wörner B13 has a notable building quality. It’s not cheap machine at all. After the disassembly, al mechanical elements were cleaned of debris and this olde grease that forms a kind of hard lack with years. Surely, the machine was serviced before: there are traces of poor repairing and assembly. I’m not sure, however, that it was also cleaned and relubed. Grease looks very old in some bearings.
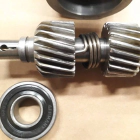
What follows are some detailed pictures of the distinct assemblies after cleaning the parts.
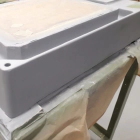
During the COVID'19 lockdown I spent part of my time disassembling the drilling press. In this post I will show the cosmetic works. The machine arrived with a nasty layer of lack over the original one. I decided to spend time recovering its original aspect. This required to strip off all the paint in bad condition and tp prepare the surface to be lackered again. In some parts, like the pulleys cover, I go until the bare metal.
The first work we do is a specific cabinet to support the drill press, to protect the electrical wiring and, to store the drill tooling. The cabinet structure is maid from steel L profile of 50mm conveniently welded. It is mounted on machine feet ans designed to be moved by using the palet jack.
Below you will find some pictures of the structure and the drill press being moved on its top.